- Epicurious 101
- Season 1
- Episode 84
Recipes for a Perfect Thanksgiving Feast
Released on 11/20/2025
Hi, I'm Frank Proto.
I'm a Professional Chef and a Culinary Instructor.
And today, I'm going to show you the best way
to make mashed potatoes, Frank style.
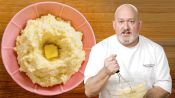
[laughs] We're talking light, fluffy, a little bit lumpy,
creamy and buttery mashed potatoes, not the sticky stuff
that your Aunt Mallory makes.
This is how to make Mashed Potatoes 101.
Good mashed potatoes doesn't take a ton of ingredients.
It doesn't even take a ton of effort.
Put good ingredients in, you get a good end product.
Who's ready to make mashed potatoes?
Anyone? [crickets chirping]
[gentle music]
When it comes to mashed potatoes,
not all potatoes are created equal.
What I like to do is mix it up.
I use two different types of potatoes.
A russet that is starchy, very fluffy,
and a Yukon that is dense and waxy.
I like the combination of both of these
'cause you're getting the best of both worlds.
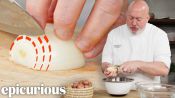
Let's talk about peeling potatoes,
and one of my biggest chef peeves
is how people peel potatoes.
They sit there and they go like this.
[buzzer]
No, that's not how this is designed to work.
What I try and do is this.
I take the top off, I take the bottom off.
Once I get the top and bottom off, long, slim cuts, right?
You don't need to sit there for an hour and peel potatoes.
This little device on the potato peeler
is actually there to take out any eyes.
That's there to pop them out.
One of the reasons I remove the eyes
is because sometimes it's a rotten piece of potato.
Second of all, aesthetics.
My mashed potatoes should not have black spots in them
unless you put black pepper in them.
If there's anything left on the potato, peel down a little,
but you definitely just want to do nice, long, slim cuts.
This goes in water now.
We'll wash it and rinse it off.
It should only take 10 seconds to peel any potato,
anything more than that, and you're just wasting time.
Stop being a chatty Cathy.
After I peel my potatoes, I put them in cold water.
There's a couple of reasons for this.
First of all, potatoes oxidize
and go gray and brown really quickly.
So this is going to slow down oxidation.
The second reason is that you can see
that there's some floaters on there.
That's just some of the dirt and the extra peels,
what I'm gonna do is I'm gonna dump this water out,
put some fresh cold water over it
just to make sure that there's no debris in my potatoes.
From here, we can take these potatoes
and make our mashed potatoes.
But if you wanna get ahead, peel them the night before,
leave them in the water, leave them in the fridge,
and they'll be good for the next day.
It's time to cut the potatoes.
A lot of times people will cut their potatoes really small,
and I don't like doing that
because then our potatoes soak up a lot of liquid.
I like to cut them large.
They take a little more time,
but in the end, our potatoes
are gonna soak up more cream and butter rather than water.
And the end result will be something a little more creamier
with a lot more potato flavor.
Did that make sense?
[gentle music]
All right, it's time to cook our potatoes.
I have a pot.
I'm gonna put the potatoes and the water in.
We're starting out with cold water
so that our potatoes cook more evenly.
We're gonna start on high heat
and then we're gonna lower it to a simmer.
If these potatoes boil the whole time,
what's gonna happen is they're gonna break up,
knock into each other.
And basically what we're gonna have
is a pot full of starchy water and not potatoes.
I'm also gonna season the water.
Potatoes are porous and will absorb some of that salt.
So I like to season throughout my cooking process.
So I'm gonna let this come to a boil
and then we will lower it down to a simmer.
We want light bubbling, not a raging storm.
See how they're bubbling nice and happily here.
We're gonna leave them on there until they are tender.
Potatoes have been simmering for about 15 minutes
and this is how I tell they're done.
I get a paring knife.
I'll take the paring knife, stick it into the potato.
They'll either break or they'll slip off really easy.
If the knife grabs onto them and they stay on the knife,
they need to go a little longer.
Before I drain them, I wanna get my butter
and my cream going.
I want hot butter and hot cream.
I don't want the butter and cream to cool down my potatoes
when I mash them.
Let's get that on the flame.
Let's get them on the right flame.
So let's drain the potatoes into a colander.
I have one in the sink.
put them back into the pot for a moment or two,
you see that there's steam coming off of them.
This is excess water that we don't want in our potatoes.
Water doesn't have flavor.
Cream and butter have flavor.
When it comes to your cream and butter,
get the best you can afford.
You're not eating mashed potatoes every day,
so you want it to be delicious.
[gentle music]
It's time to mash.
My potatoes are hot just out of the pot.
My cream and butter are hot, right?
Everything should be hot
because we wanna serve these pretty much right away.
I might get a lot of hate for this,
but my weapon of choice is the old school
granny mashed potato masher.
You can use other equipment for this.
There's a food mill, a potato ricer,
but for the most part,
those take up a lot of space in the kitchen,
they're hard to clean, they're cumbersome.
Pureed potatoes are the ones that you put
through the ricer in the food mill,
so there's absolutely smooth and no lumps at all.
This is mashed potatoes, not potato puree.
So mashed potatoes for me have lumps.
First thing I'm gonna do is add a little bit
of salt and pepper.
This might not be the total amount that I need,
But I like to add my salt now,
'cause when I put the liquid over it,
it kinda starts to dissolve the salt.
Put about half the cream and butter and start to mash.
When it comes to seasoning
and liquid in our mashed potatoes,
it's easier to add more and really hard
to take any of that away.
Our butter and cream is hot, our potatoes are hot.
See, I added about half, I'm gonna add just a little more.
And then I'm gonna get in there and really start to mash.
It is possible to over mash these,
but by the time you got to that point,
your arm would probably fall off.
So for the most part,
when it comes to this old school mashing method,
you can't over mash.
I think I need a little more cream and butter.
I think I'm gonna use it all.
Yeah, there we go.
For my seasonings with these mashed potatoes,
I'm using salt and pepper.
And that's all that I need.
I wanna taste potatoes.
We need just a little more salt.
I am seasoning to the point where it's seasoned,
but not salty.
I season as I go, and then I taste.
Couple of mistakes people make
is they just dump a lot of salt in,
and they don't taste their food.
You have to taste your food while you're seasoning.
My mashed potatoes are done.
I like the texture.
There's some lumpiness there.
There's some creaminess.
And I'm basically going on site.
That to me is a really nice mashed potato.
Look at that.
They hold onto the masher and plop off.
It's time to plate our mashed potatoes
and I'm going to give some nice big scoops here.
You want a big pile of these, right?
Go for the visual side of it.
Don't be skimpy.
And what's necessary here is a volcano.
Nothing better than gravy or more softened butter
in your volcano.
And here it is, my version
of creamy, buttery mashed potatoes.
When you serve this up, make sure you break that volcano
so you get a little bit of that visual ooze of the butter.
Look at that.
Put it on your plate and then dig in,
get a nice little hunk with some of that melty butter.
There's not many times in life where simple ingredients
make something so delicious.
Butter, cream, salt, pepper, and potatoes.
How do you beat that?
I dare you to find someone
that doesn't think this is delicious.
I dare you.
I'm Frank Proto, Professional Chef and Culinary Instructor,
and today, I'm gonna show you
how to make the best gravy you've ever had.
Silky, smooth, flavorful gravy that anyone can make.
This is Gravy 101.
Gravy is a sauce made from the thickened
and seasoned juices of cooked meat.
People usually make gravy when they're doing a large roast,
and they have all the drippings in the roasting pan.
Pretty much anytime you make a roast,
you should be making gravy.
Today I'm gonna show you how to make the classic version
that I was taught in culinary school many moons ago.
[gentle music]
In order to make a delicious gravy,
you have to season your protein
and get yourself some mirepoix.
A classic mirepoix is 50% onions, 25% carrots,
and 25% celery.
That's all it is.
It sounds fancy.
It's just onions and celery and carrots.
There are two main reasons I use a mirepoix for my roast.
First of all, it's gonna keep my roast
off the bottom of the pan,
and it's not gonna stew in its own juices.
Second of all, I want this to flavor my juices.
I'm gonna get some really nice caramelization
and flavor from this mirepoix.
All you really have to do is put these into the pan.
You'll notice that I cut everything really large.
I don't want these to fall apart.
I want them to hold their shape.
If we cut them really small,
they're gonna give off too much flavor
and we'll taste veggies, not turkey, in our gravy.
When I went to culinary school,
my basic skills teacher always told us
to leave the skin on your onions
when you're doing a gravy or a stock.
It lends color to our finished product.
So our basic mirepoix's in there.
I'm gonna add a head of garlic cut in half.
I'm going to add a couple of bay leaves and some thyme.
So I'm just gonna give it a little bit of oil,
a little bit of salt.
I'm just gonna give it a little light toss.
And then I'm gonna bunch everything
into the middle of my pan.
And that's gonna be where my turkey's gonna rest.
I also have a neck, which I'm gonna add into there.
That neck is gonna give us flavor.
And I also have this bag.
If you've taken this out of your turkey
and you have no idea what it is, it's the bag of giblets,
and that usually has livers and gizzards and hearts in it.
I add those giblets to the base of my pan.
It's gonna help to flavor my gravy.
I'm gonna oil this baby down.
I'm gonna do salt and pepper.
Throw a little salt into the turkey too.
I have my mirepoix in the pan, it's seasoned up.
I have my turkey in the pan, it's seasoned up.
I got my giblets in there too.
We're gonna fly this bird into the oven.
425 for the first hour.
That's gonna jumpstart the browning on the skin,
and then I'm gonna lower it down to 325
so that my turkey stays nice and juicy.
[gentle music]
The turkey is out of the oven.
It's golden brown and delicious,
but I want you to see this.
Look at all these delicious juices in there.
You can see our vegetables are nice and caramelized.
We've rested the bird for about 10 to 15 minutes.
When you cook it,
the juices kind of all go towards the center.
When you rest,
the juices kind of relax and go back into the turkey.
Whatever juices don't stay in the turkey,
go to the bottom of the pan to make a great gravy.
So what I do is just stick this into the cavity
and I lift my bird out.
I'm gonna drain any excess juices
from the inside of the bird.
I wanna keep all those juices.
Remember, that's our flavor, and we can put this aside.
What we're left with in the pan
is all the juices and drippings from the turkey.
And because we stacked that mirepoix up really high,
the bird got brown on the bottom,
and we collected the juice in the bottom of the pan.
And that is the base for a delicious gravy.
I've seen people throw this away,
and it made me pull my hair out.
All the flavor we need for our gravy is here already.
We just have a few more steps
until we have a beautiful, silky, delicious gravy.
I have my roasting pan with all my turkey parts,
mirepoix, and juices.
What I'm gonna do is I'm gonna turn this up
and I'm gonna let the juices boil down to make a fond.
We're gonna use the turkey fat to make the roux.
A roux is usually equal parts fat and flour,
and it's used to thicken soups, stews, sauces, and gravies.
Let this cook out.
Let's evaporate all the liquid,
and then we can add our flour.
If you look in my pan, start to see a slick of oil on top,
like an oil slick of turkey fat, and that's what I want.
What I'm trying to do here is create a fond, F-O-N-D.
Fond is the caramelized juices at the bottom of the pan.
The fat's starting to separate out from the juices.
It's starting to look like a little greasy or oily,
and that's what I'm looking for.
Once we start seeing clear fat at the top, we're good to go.
At this point, we can make the roux with the turkey fat.
I have this on a medium heat
I'm gonna sprinkle some flour all around
so that it soaks up all that beautiful turkey fat.
Stir, stir, stir.
The fat is combining with the flour
and that's gonna make us a nice roux.
What I'm looking for here is that
we don't see any more fat on the surface of the pan.
So just enough flour to soak up all that fat
and we can add some stock.
I like to use turkey stock, you can use chicken stock,
whatever stock makes you happy.
And what we can do now is start scraping the bottom
and getting all of that beautiful fond off
the bottom of the pan.
And now all I want to do is start stirring it
until it starts to thicken.
At this point if your gravy
is too thick you can add a little more stock.
If it's too liquidy let it cook a little longer
and see if it actually thickens up.
I'm gonna let this come to a simmer.
I'm gonna keep stirring it so it doesn't stick anymore
and I'm gonna keep scraping the bottom
to get any of that beautiful fond off of the bottom.
As my gravy starts to thicken I want to give it a taste,
just a preliminary taste to see where my seasoning is at.
All right, definitely needs a little salt.
You can also see that it's a little on the thick side,
so I'm just going to add a little more stock.
If it's too thick, we add a little more stock.
If it's not thick enough, we reduce it a little.
Let it come back up to a simmer and see where we're at.
One last taste.
Tastes good, I think we're ready to strain.
And I'm just going to dump this through the strainer.
A couple of things I want to keep in mind when I strain
is I don't want to push these vegetables through.
It's going to leave little bits and pieces
floating in my gravy.
So I just want to let the juice fall through
and stir lightly, trying not to break up too many things.
Here we have our finished gravy.
Now I want you to listen really quick.
I'm going to get a ladle full.
What do you hear?
Kind of sounds smooth, right?
If I did that and I heard plopping,
that would mean my gravy is way too thick
and we can adjust with more stock.
This one is the perfect consistency.
[gentle music]
We've taken all this time
to make this beautiful, luxurious gravy.
It needs to have a gravy boat.
Put it in a vehicle that makes your gravy look even better.
So I'm gonna ladle it in.
This gravy looks good enough to drink,
but I have a better idea.
Remember that turkey I roasted earlier?
Well, here it is on the plate.
And the only way to make it better
is to take the star of the show
and slather it all over our turkey.
Ooh, I don't know about you, but I like my turkey
to swim in the deep end of the gravy.
Let's taste.
Now I'm gonna get a lot of gravy on this baby.
Let's slather it on there.
First thing I taste in the gravy
is that it's roasty and delicious.
It's got a really great consistency.
It's luxurious, it's silky, it's not thick and lumpy,
and it sticks to the meat, and that's what I want.
We've taken a lot of care to make this gravy.
We roasted a turkey, we made the mirepoix,
we made a roux out of the fat.
We made it so it was the right consistency.
And the thing that a good gravy does
is it raises everything up.
It takes this turkey that could be a little dry and bland
and makes it that much better.
Take your time and your gravy will be as good as mine.
Hi, I'm Frank Proto.
I'm a Professional Chef and Culinary Instructor.
And today, I'm gonna show you the best way
to make roasted potatoes at home.
We're talking everything you need to know
about making roast potatoes crispy on the outside
and soft and fluffy in the middle.
This is Roasted Potatoes 101.
This recipe is not hard.
It doesn't take a lot of ingredients.
It doesn't take a lot of special items.
Let's go prep our potatoes.
[gentle music]
The potatoes we're using today are russets.
Russets are a starchy potato that roasts up really well.
A lot of times when you have French fries,
they're using russets.
So these are the ones that get crisp on the outside
and soft and fluffy in the middle.
For the most part, I'm peeling these potatoes
'cause I wanna par-cook them.
Basically, the starch is gonna gelatinize
and we're gonna have a nice kind of crust
on the outside from that.
You can do this with the jackets on, that's fine,
but I feel like you get a better crunch
if you take the skin off.
You can see the potato's long and skinny.
I usually take the top and the bottom off
and then we peel in between
so we kind of just do a clean sweep of the potato.
It shouldn't take more than 10 seconds per potato.
So I'm gonna put this potato in the water
not only to kind of wash off the outside,
but to also keep them from oxidizing.
You'll see the oxidation pretty much starts fairly quickly.
It'll start to turn kind of grayish or grayish brown.
Is it bad at that point?
No, you can peel it again and get all that gray off
and then put it in some water.
You don't wanna do it for too long.
I usually do it for maybe three or four hours if I have to,
but I wouldn't put these in the fridge overnight.
So at this point, our potatoes are in the water.
They are rinsed off really nice,
but all that stuff that was on the outside
is kind of floating around in my water.
What I wanna do is dump this water out,
put some fresh water on top to cook the potatoes.
Our potatoes are in clean water
and now we're gonna cut them into the perfect size.
So I'm gonna take my potato
and I'm gonna cut it in half.
Now, I think that this might be a little too large
for one bite, but I think this is a great size.
Not only do they cook fairly quickly,
you have a nice ratio of crunchy outside and soft inside.
What I found with this method
is that I get a good consistent result that's delicious.
[gentle music]
By starting the potatoes out in cold salted water,
we're gonna start the process
of cooking the potatoes through.
So if we don't do this step,
The outside of the potato is gonna be crispy
and the inside will be hard.
And I'm not shy about the salt
'cause it seasons that outside of the potato.
So give that a quick stir with your spider.
Once it comes to a boil,
we're gonna lower down to a simmer.
We don't want this to boil the whole time
because what happens is the water's really rough,
the potatoes kind of hit into each other
and they start to break up and fall apart
and give off too much starch.
Boiling potatoes can take anywhere
between five and 15 minutes,
but for the most part, they're in the simmering water
for a short amount of time.
A lot of people will be tempted to get in there
and start stirring things up.
Don't, just leave it alone.
Let them come to a boil gently, lower them down,
and then we can get in there
and see if they're ready to go or not.
Now the potatoes are boiling.
I'm gonna lower it till it's just a light simmer.
We see little bubbles here and there.
We wanna get these at the right stage
so that they're slightly cooked.
I'm gonna stick my knife in here,
and you can see that it holds onto the potato.
It's sliding just slightly.
The outside is soft.
You can see when I stick my finger in there,
I get an indentation, and that's what I want.
Also, if I get my nail, put my nail in it,
the top layer kind of squeezes off.
So it's time to take these potatoes out of the water.
Let's shut our water off.
You could use a colander,
but I find using one of these spiders
is a lot more efficient.
We want the potatoes to be dry at this point.
The drier the potato, the quicker it browns.
You can see that there's steam coming off them,
which is drying them out as well.
Before we put these into the pan,
we need them to cool all the way.
What that does is it allows the starch
on the outside to firm up.
That's gonna ensure a nice crispy crust.
[gentle music]
I want that brown crust, so I start my potatoes
in a cast iron skillet on the stove.
The reason I choose cast iron
is because it holds the heat really well.
I can tell my pan is ready
because I do see a little wisp of smoke coming off of it.
Today's potatoes, we're using ghee,
which is basically just a clarified butter.
It has good flavor and it has a high smoke point.
We wanna have a high smoke point
so our oil does not degrade and give us weird off flavors.
So Chef Frank, why don't you just use whole butter?
If I use whole butter, the solids in the whole butter
are gonna burn before the potatoes are actually cooked.
With the ghee, I'm not shy, right?
I'm gonna plop it in there.
Ghee is butter without any solids in it,
so you shouldn't hear a lot of snap, crackle,
and pop going on.
It should be just kind of a light little crackle.
You can see my fat is hot.
I have a light haze of smoke.
That's good.
I have it on low heat right now.
I'm gonna turn it up just a little
before I add my potatoes,
because when I add the potatoes to the pan,
it's gonna cool the pan off slightly,
and I don't want that.
I wanna try and maintain temperature.
I'm gonna start with the flat sides.
You can see as I put them in the pan, what's happening?
I see bubbles, bubbles are good.
Bubbles usually mean that the moisture is cooking off
and the fat is doing its job by browning the outside.
I try not to overcrowd the pan.
If I put too many potatoes in there,
we're not gonna get a nice even brown.
We're gonna get kind of a more spotty brown,
and they might give off some moisture
and stop the browning process from happening.
Moisture is the enemy of brown, crispy goodness.
At this point, my potatoes are bubbling away happily.
I'm gonna turn my heat up just a little bit
and I'm gonna give them a check, right?
They shouldn't be sticking,
but they should also be starting to brown.
I think it's a good opportunity
to put a little seasoning on these right now.
We'll go with a little bit of salt,
a little bit of black pepper.
I go light on the seasoning right now
because I like to season throughout the process.
Seasoning throughout the process
ensures that we season evenly.
Things aren't salty, they just have really good flavor.
All right, let's look at our potatoes.
I'm starting off some nice browning on the outside.
What we're gonna do is we're gonna turn them now.
Look at how beautiful that is.
It's starting to get nice and brown, right?
And that's what we want.
We want the brown to be started,
and then we can throw these puppies in the oven.
[gentle music]
So now I'm gonna take these
and put them into a preheated 400 degree oven
to continue that beautiful browning.
The potatoes are gonna be in the oven
for about 20 to 25 minutes.
At about the halfway mark, we're gonna turn them over
so that we ensure we get that nice golden crust
all the way around.
So these potatoes are about halfway through
and they're ready to flip or turn.
So you can see what's happening over here.
We're getting more brown.
So I'm gonna give them another turn,
try and get as brown as we can on all sides.
Smells delicious, looks delicious.
Now we can put them back in the oven just to finish cooking.
Potatoes are out of the oven.
They're crispy and delicious looking.
What I like to do at this point
is take them out of the pan
and let them drain on paper towels
just to get any excess fat off of them.
And back in the day when I worked at McDonald's,
this is what they would use on the fries, fine salt.
Basically a popcorn salt.
And it's called popcorn salt because it's super fine
and it sticks to the popcorn.
If you don't have popcorn salt, just get a blender out,
blitz up a little regular salt
and you'll have a nice fine salt for this.
It's been a long time since I worked at McDonald's,
but this is one of those things that stuck with me
throughout my culinary career.
For our final garnish, I'm gonna add some herbs to these.
I chose chives and parsley.
First of all, chives have a nice oniony bite,
and I love that, right?
We'll take a little bit of a parsley,
and the parsley gives us a lot of freshness, right?
We have that rich butter in there.
We're gonna have a buttery flavor,
and the parsley and chives is just gonna kind of lift it up
and slightly cut it.
So you take your parsley, roll it up,
and then I'm just gonna chop.
I always add my herbs at the end.
If you put them in the pan,
pretty much all the flavor goes away and they burn
and they get too dark and they're just little burned bits
on your potatoes.
Buttery, herby and delicious.
And there you have it,
the best way to make roasted potatoes.
Okay, it's time to taste.
Look at how beautiful they look, right?
We can hear that that's crispy on top
and that's what we want.
Right, so crisp on the outside.
Look at how soft and fluffy that is on the inside.
So let's give it a taste.
Actually, it's a little on the creamy side on the inside.
The outside's got this nice nutty flavor from that ghee.
So even though there's a couple of extra steps with these,
it is worth it 100%.
Look at that inside, nice and soft.
If you wanna show your chef skills off to people,
make them some roasted potatoes.
Simple, easy, and delicious.
I'm Frank Proto, Professional Chef and Culinary Instructor.
And today, I'm going to show you
the best way to make stuffing.
I'm going to show you how to make stuffing
that's going to keep them coming back for seconds
or thirds and possibly fourths.
This is Stuffing 101.
I truly believe that stuffing
is one of the most important dishes
on your Thanksgiving table.
First of all, it soaks up a lot of gravy,
and it's really delicious.
Second of all, we get to use up
any leftover bread we might have.
And third of all, you can make it in so many different ways.
One of the major pitfalls with stuffing
is that it's either too wet or too dry.
And what I'm gonna show you is how to find
that middle ground where your stuffing
has the perfect texture.
[gentle music]
There's a lot of different breads you can use.
I'm gonna use a baguette.
You can use sourdough, rye bread, white bread.
It's pretty much whatever you prefer.
But the reason I choose the baguette
is that it's sturdy, it holds together,
and it doesn't disintegrate when I start
to add all the other ingredients to it.
I like to use day-old baguettes.
It's already started the process of drying out.
All right, let's cube up this bread.
I'm just gonna take a half a loaf right now.
I leave the crust on.
I like the flavor of the crust.
I like the way it looks.
And we're gonna cut it in half and half again,
and into nice cubes.
These cubes go onto a tray to start that drying process.
Now that I have the bread cut,
I want it to dry out for a few days and get really firm.
If you don't have the time to let it dry out
for a couple of days, what I like to do is take this,
put it in a low oven, 200, 250 degrees,
until it gets most of the moisture out.
In front of me, I have a tray of bread
that's already been dried, and if you look at it,
you squeeze on it, it doesn't go anywhere, right?
It's firm.
If you drop it, it doesn't shatter, but it's really loud.
It's not soft at all.
We have nice, dried chunks of bread.
[gentle music]
One thing I love about this dish is that
it's one of those things you can do ahead.
it actually tastes better after a day or two.
So I got some oil in the pan
and I'm gonna fry off my sausage.
I'm using breakfast sausage out of the casing.
I feel like the flavor of breakfast sausage
mirrors a lot of the flavors we use
in Thanksgiving already, sage, thyme,
so that's what I'm going with.
A lot of breakfast sausage has a high proportion of fat
and I want that in my stuffing.
It flavors the whole stuffing.
Let's go in the pan.
And I know it looks like a lot of sausage,
but I'm feeding a lot of people, it's Thanksgiving.
So I'm gonna get this in the pan.
Start cooking it and start breaking it up
into little chunks.
What we're trying to do here is render off some of that fat
and brown our sausage so we get that caramelization
and those caramelized flavors.
So break it up as you go.
One of the great things about stuffing
is you can use a lot of different flavors.
If you don't like breakfast sausage, find some chorizo.
If you don't like chorizo, you can use Italian sausage.
It's really adaptable to what you want in your stuffing.
You'll notice that I'm not putting
any salt and pepper on this.
Most sausages come seasoned already,
and I'll season the whole dish later on,
rather than trying to season the sausage.
There's salt, there's flavor in here already.
I don't think we need to add any more to that.
The sausage is nice and brown.
It's cooked most of the way through,
and we're gonna use that slotted spoon
to take out the sausage,
leaving as much of the fat behind as I can.
If I tilt the pan back and run my sausage
up to the back of the pan, you can see that I'm getting
a lot of the fat draining off as I take it out.
And now I can start cooking my vegetables for the stuffing.
All right, so we just let the fat from the sauces get hot,
and we can add our onions in.
All the vegetables for my stuffing are rough chopped
or large chopped.
I wanna still see them in the finished dish.
So I go a little bigger on the vegetables.
Whenever I cook onions,
I always add just a little bit of salt.
It's gonna draw out the moisture
and let our onions start breaking down.
I'm also gonna add just a little bit of pepper now too.
I like to season throughout the process.
So you can see my onions are starting to get brown.
We can add our celery now.
A lot of times with stuffing, you'll see celery.
Celery is just that flavor profile
that goes really well with this.
So once our celery starts to cook down,
I can add my bay leaf.
I have some chopped thyme, some sage, and some rosemary.
Just stir those in.
Top garlic goes in at the end
because it tends to burn really quick.
And if I put it in earlier, I have burnt garlic,
not toasted garlic.
All right, my veggies look good.
They're starting to get fragrant.
And now it's time for the butter.
It looks like a lot of butter,
and yes, it is a lot of butter,
but that butter is gonna soak into that bread
with the stock and the sausage,
and it's gonna make this stuffing so delicious and moist.
Thanksgiving and the holidays
is no time to skimp on the butter.
So you can see that I have some brown bits on the bottom.
That's my fond.
And that's where all the concentrated flavor is.
Once we add the stock to this, that's gonna melt
and give us some nice caramelized flavors.
All right, we're done.
I can shut my heat off.
And what I'm gonna do with this now is add it to my sausage.
Get all the butter in there, scrape it into here,
mix it all together.
I'm gonna take the bay leaf out, get rid of the bay leaf.
I have all of my cooked ingredients in the bowl,
the sausage, the herbs, the veggies, the butter.
Now all we really have to do is get this mixed in
with our bread and some stock and then bake it in the oven.
[gentle music]
It's time to put everything together.
So the bread goes in first.
It's gonna start soaking up all the liquid right away.
And that's what we want.
Make sure you have a big enough bowl for this
because if you don't, it's going everywhere.
You take your sausage and aromatics and butter
and you put it over the top.
And what this is gonna do
is start soaking into the bread immediately.
And that's what we want.
I'm gonna add some stock.
I'm not gonna add it all at once.
I'm gonna add it and see where we're at.
So I'm gonna go about half.
I'm using chicken stock.
It is kind of a neutral stock.
It's gonna add some background flavor,
but it's not gonna take over.
We're gonna start mixing.
And what I'm looking for here is that my bread
starts to get a little soaked
with all of the flavorings and the stock.
I think it's a good time to also add some salt and pepper.
Our bread is kind of bland compared to the sausage.
So we do wanna season this really well.
Keep on mixing and stirring.
I'm gonna let this soak for about five minutes,
just so that we start seeing our bread is softening.
We don't wanna put this in the oven
when our bread is still hard.
You can see that it's already starting to soften up,
and that's what we want,
but we want it to be a little softer than this.
And it's time to put it into our baking dish.
I'm not gonna butter my baking dish.
We have a lot of butter in the stuffing already,
so let's just dump it in.
Oh yeah, yeah.
I'm just gonna kinda let it settle in here.
Stuffing is usually put inside the bird
when the bird's roasting.
Dressing is something that we make outside of the bird
in a dish like this.
I don't like stuffing my bird with stuffing
for the main reason that
it makes the bird take longer to cook.
For me, in my mind, it's interchangeable.
I'm not gonna split hairs with this.
It's a stuffing, it's a dressing.
I'm not gonna argue about it.
I'm gonna put it in the oven for about a half hour.
What I'm mainly looking for
is that the top gets nice and crispy
and we don't have any moisture left in here,
all the moisture's sucked into the bread.
So let's get it into the oven and then we get to eat.
[gentle music]
It's been about a half hour, my stuffing is out of the oven.
And if you look at it, the top is a little dried out.
There's a lot of crunchy bits, there's some soft bits.
It's got a lot of textural difference going on
and that's what makes me so happy about stuffing.
There's a lot going on in a few little bites.
We finally get to Thanksgiving dinner.
I got my turkey, my green beans, my mashed potatoes,
my cranberry sauce, my gravy.
We saved the best for last.
We got the stuffing.
Right there.
It's kind of like the place of honor.
That's the head of the table right here.
Look at this beautiful plate in front of me.
It's got everything on it,
and it's got a really nice mound of stuffing.
So without further ado, let's give it a taste.
Of course, I want to dip it in a little bit of gravy.
And luckily my mashed potatoes are holding the gravy for me.
You can really taste all the herbs
and aromatic vegetables you have in there.
The sausage gives it a nice kick.
If you take the time and the effort
to make your own stuffing,
I guarantee everyone's gonna go back for seconds.
I'm Adrienne Cheatham, I'm a Professional Chef,
and today, I'm gonna show you how to make
the best biscuits at home.
We are talking crispy, fluffy, airy, delicious,
and not those lifeless, pale blobs of dough.
This is Biscuits 101.
To me, the perfect biscuit
is like croissant's thicker cousin.
It's denser and thicker on the inside,
but it still has that beautiful,
shattering crust on the outside.
There are very few ingredients, very few steps.
It's just a matter of the technique
that you use to make them.
[gentle music]
The most important thing when you're making biscuits
is keep it cold.
Keep your fat as cold as possible
so it doesn't melt and soak into the flour
and make your biscuits heavy.
The first thing we're gonna do
is grate butter on a box grater.
You can't grate butter once it's soft,
So it's best to just throw it in the freezer
the night before.
[butter banging]
It is rock hard.
You do wanna work quickly
so you don't let your butter heat up.
Another important part of why we keep the butter so cold
is because we're baking our biscuits at 425.
You don't wanna give the butter a chance to slowly melt
while it's starting to bake.
You wanna shock it with heat
so that right away,
the water content of the butter evaporates
and that's what gives you the lift inside the biscuits.
I'm using the large holes on the box grater
because I want big, flat, long pieces of butter.
They really give you a more defined pocket of air
in your biscuits.
The butter is grated.
I'm gonna pop it in the freezer
so it stays really, really cold.
So now I'm gonna mix all of my dry ingredients.
All-purpose flour, regular, degular-ass flour,
same that you'll get anywhere.
Wondra Flour.
The cool thing about Wondra Flour
is that it is a pre-gelatinized starch.
That means the starch has actually been kind of cooked.
So starch molecules swell up
and this flour has been cooked so that it swells up
and then they stop that process.
So it's better to mix with cold ingredients.
It also takes shorter of a cooking process
because you don't have to go through the whole swelling
and cooking of the starch molecule.
and it has a little bit lower protein,
which means lower gluten,
which means your biscuits will be a little fluffier
and lighter because you don't have as many
of the gluten strands giving you that chew
that you would get using all AP flour.
Sugar, you need a little bit of dimension and flavor,
so salt and sugar kind of balance that out.
It also helps with the browning process
when the biscuits are baking later.
Baking powder and baking soda.
We're using two leavening agents
to get maximum lift in these biscuits.
I do like to use a whisk with the dry ingredients
because it just really helps get everything incorporated
and dispersed very thoroughly.
Now we add our frozen butter.
I am just going to toss with the flour
and the dry ingredients
because I really want each little shard of butter
to be coated in the flour mixture.
So that way we have these beautiful little individual pieces
of butter that will give us such nice flavor
and such nice lift in our biscuits.
So I'm just lifting from the bottom
and letting the butter and flour fall through my fingers.
I'm not pressing it or packing it.
So this is how it should look.
You wanna see these beautiful little curls of butter
coated thoroughly in the dry ingredients.
This will also help keep them separate
when we add our wet ingredients.
It's kind of like breading a piece of chicken to fry it.
it'll have its own little coating,
so that way it'll stay separate from everything else.
You don't need to overwork this,
you just wanna do it a few times
until you see all the butter is coated
and you should be good to move on to the next step.
So buttermilk is a little bit acidic,
it gives you a nice tangy flavor.
We have a lot of fat in the dough with the butter,
so the buttermilk will provide us
with a little bit of tart tanginess
to kind of balance out the flavor of the biscuit.
So at this point, I am using a spatula.
I don't wanna get in there with my hands
because it'll take me so long
to clean everything off my hands
that I will warm up the butter in the process.
I'm just barely folding everything together
with this silicone spatula,
going around the edge and folding it through
just to kind of disperse the buttermilk
into the ingredients.
[gentle music]
I have a piece of parchment paper here on the board
on the work surface
because I don't wanna touch the dough too much.
So putting the parchment paper down
and adding the ingredients in to press it into a rectangle
will help me move it to put it into the refrigerator
without having to like fumble it and mess it all up
once I've made this nice rectangle.
So the ingredients are still very separate-ish.
Buttermilk will slowly hydrate the flour,
but you don't wanna start with a dough that's too wet.
I'm not really kneading it.
We wanna keep it in these nice shards
that are just barely coated in flour
and just barely held together with buttermilk.
Now, this part does get dangerous.
My hot hands are touching this dough,
so I'm working quickly just to form it into a rectangle.
I'm just barely pressing everything together.
If you feel it getting sticky,
You can just put a little flour on your hands
and I'm just going to kind of guide it with one hand
and make a nice clean edge with the other.
Boom, there we go.
Now I'm gonna transfer this to a sheet tray.
With the paper, all I have to do is pull it
and this is gonna go back into the refrigerator
to stay nice and cold.
That's doing so pretty.
This is kind of the fun part,
but again, you have to work fast
because you want to keep this cold.
Cold is key.
I kinda like to use the croissant method
where you make a book fold.
The main point is that you're creating layers.
Take one side and fold it into the center.
Take the other side and fold it into the center
so that they're meeting in the middle.
Now, I'm gonna fold it over onto itself
so I have four layers here.
If I were in like a super fine dining restaurant,
maybe I would have to clean up the edges a little bit,
but I kinda like it like this.
I'm just gonna give it a little bit more flour
just to keep the butter from sticking.
And I'm going to rotate it
because now we're gonna roll it back
into a rectangle that was about the same size.
We're going for about 12 to 18 inches.
Doesn't have to be perfect, don't worry.
Don't bust out the measuring tape.
The only real way to mess this up is to let it get too hot.
So if your kitchen is really hot,
work a little faster and just pop it back in the fridge
if you need to.
It's really coming together.
The buttermilk is hydrating all of the ingredients.
We're gonna do the fold one more time.
I can feel my dough getting soft,
which means it is getting a little bit warm,
so I'm gonna work pretty quickly here.
And this is gonna be the last time that I roll this out.
So I'm just gonna flip it.
If you see the front here, you can see the layers,
and there's more layers on the inside
that have just been rolled out.
This is really gonna help us get nice lift
and nice definition.
More folds mean more layers,
which means more flakiness in your biscuit.
But if you're sacrificing cold for layers,
it's not worth it.
I've really found that twice is kind of the sweet spot
between getting the lift in the layers that I want,
but also keeping the identity and integrity
of what a biscuit should be.
I have the dough in a square.
We don't need to do the rectangle again.
Lift this up, put it back on the tray,
and get it cold for about 20 minutes in the fridge
until we cut and bake.
[gentle music]
Booyah.
Look at that beautiful biscuit dough.
It is amazing.
You can use a biscuit cutter, you can use a glass.
However, a lot of them are not sharp enough,
so they pinch the dough as you're cutting down.
It won't let the dough rise.
It'll kind of like squish it down on the sides.
You also get waste cutting circles out of a square.
So I'm gonna cut this into about two inches,
and I'm using a sharp knife,
so that way it doesn't pinch the dough,
it just goes straight down.
So I particularly love cutting my biscuits into squares
because I don't know about you,
but I love like the corners of lasagna.
I like all those crispy edges
and the browning and all that.
So I like doing square biscuits
because you get those corners that are a little crunchier,
you get all the sides and everybody gets that goodness.
So transfer these beautiful biscuits
to a parchment lined baking tray about an inch apart.
I want to keep this cold.
If they feel like they are warming up,
go ahead and pop them in the fridge or the freezer,
take care of the rest of your biscuits,
and then go ahead and bake.
We're starting at 425,
and it's best if you have a convection oven
to turn that on because you really want the air
to circulate and be even so you don't get hot spots
in your oven where the butter melts on some
but really puffs on the others.
Now we will get these in the oven.
Your biscuits should take about 20 minutes,
but if your oven is really powerful,
your convection fan is blowing like crazy,
it might be closer to 15 minutes.
It might be longer to 25.
So just keep an eye on it.
When you start to smell them,
that's when you know you're getting close.
When they have that beautiful golden crust,
go ahead and pull them out.
One thing you do not want to do
is open your oven door to check.
The temperature dropping will stop that rising process
and it'll collapse.
[gentle music]
Bonus points.
We're gonna make a little bit of honey butter
to brush onto our biscuits.
Totally optional.
I'm using two tablespoons of butter,
about two tablespoons of honey.
Don't get me wrong, the biscuits are delicious on their own,
but adding the honey butter on top
gives it another dimension of depth of flavor.
A sweetness to offset the saltiness.
This butter is just nice, soft at room temperature.
And you can see they just stir together really nicely.
This is perfect.
You don't want it to be too cold
because you won't be able to get the brush in there
to get it on top of the biscuits.
And you don't want it to be too soft
because then it's melted and the fat
and the liquid in the butter separate.
So this is still fully emulsified, homogenous.
You'll get nice, even coating on your biscuits.
This is exactly where you want it to be.
[gentle music]
The moment we have all been waiting for.
A lot of people will pull the biscuits
a little bit too early
while they're still a little bit blonde.
I like my biscuits to be just past that golden brown
and go a little bit deeper
because you're really getting more depth of flavor.
You're getting more caramelization,
you're getting crispier corners,
and you're also setting those layers in between.
So while they are still hot,
I'm gonna brush some of this honey butter on them
to kind of glaze the tops of these beautiful biscuits.
So on top of the honey butter,
just a little bit of flaky sea salt.
You get crunch from the salt.
You also get these little pops of salinity
that contrasts so nicely
with the honey butter brushed on top.
This is how you show somebody you really care.
Okay, hurry up and cool down so I can eat you.
We are going to plate them.
How do you like that?
What if I gave you like a pyramid of biscuits?
Would you be happy?
You can see how the bottom is not burned,
but it is deeply golden and crusty.
So we're gonna get a lot of texture from all of this
and a lot of flavor from everything that we put into it.
[biscuit crunching]
Oh my God.
You get a little bit of the tang from the buttermilk.
You get sweetness.
You get a little bit of seasoned like saltiness
to balance that out.
but above all, you get this soft, fluffy interior
and this absolutely amazing crunch on the outside.
Making biscuits can seem a little daunting at first,
but it is very simple.
So if you just pay attention to the details
and a couple little tricks and tips and just follow them,
you will have an amazing outcome every time.

The Best Way To Carve A Whole Chicken

The Best Way To Clean and Season a Cast Iron Skillet

The Best Way To Sharpen & Clean Knives (And The Worst)
16 Ways To Peel & Cut Garlic Like A Culinary Instructor

The Best Way To Make French Fries At Home (Restaurant-Quality)

The Best Ways To Cook Bacon (And The Worst)

The Best Way To Fillet A Whole Fish

The Best Ways To Peel & Cut Onions (And The Worst)

The Best Ways To Make An Omelet (French & American)

The Best Way To Make Chicken Stock

The Best Way To Deep Fry Anything

The Incredible New Way to Poach Eggs that NEVER Fails

The Best Way To Make Pasta From Scratch

The 9 Essential Knife Skills To Master

The No-Fail Way To Sear Any Meat Perfectly
The Best Mashed Potatoes You'll Ever Make

Cooking Tips For Kitchen Beginners

The Best Way To Make Perfect Pancakes

How to Make Restaurant-Quality Mac and Cheese at Home

The Best Tomato Sauce You'll Ever Make (Restaurant-Quality)

The Best Salad You'll Ever Make (Restaurant-Quality)

The Best Fried Rice You'll Ever Make (Restaurant-Quality)

The Best Way To Make Sushi At Home (Professional Quality)

The Best Roasted Potatoes You'll Ever Make (Restaurant-Quality)
The Foolproof Way To Make Rice Like A Master Sushi Chef

The Cacio e Pepe Hack That Never Fails (Ft. Binging with Babish)

The Best Pizza You'll Ever Make

The Most Perfect, Silky, Creamy Scrambled Eggs You'll Ever Make

The Best Buffalo Wings You'll Ever Make (Restaurant-Quality)

The Best Tonkatsu You'll Ever Make (Restaurant-Quality)

The Best Chicken Breast You'll Ever Make (Restaurant-Quality)

The Best Grilled Cheese You'll Ever Make

The Best French Toast You'll Ever Make (Restaurant-Quality)
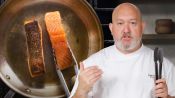
The Best Salmon You'll Ever Make (Restaurant-Quality)

The Best Potato Salad You'll Ever Make (Deli-Quality)

The Five Knives You Need In Your Kitchen (And How To Use Them)

These 5 Sauces Will Upgrade Your Weeknight Meal Game
The Best Pork Chop You'll Ever Make (Restaurant-Quality)

The Best Fried Eggs You’ll Ever Make

The Best Stuffing You’ll Ever Make

The Best Gravy You'll Ever Make

The Best Chilaquiles You’ll Ever Make (Restaurant-Quality)

The Best Guacamole You’ll Ever Make (Restaurant-Quality)

The Best Chocolate Cookies You’ll Ever Make

The Best Mexican Rice and Beans You’ll Ever Make

The Best Mexican Chicken Tacos You’ll Ever Make

The Best Sandwich You’ll Ever Make (Deli-Quality)

The Best Lasagna You'll Ever Make (Restaurant-Quality)

The Best Ways to Reheat Leftover Pizza (And the Worst)

The Best Queso You'll Ever Make is Queso Fundido

The Best Tortillas You Can Make at Home

The Best Salsa You'll Ever Make

The Best Pasta Carbonara You'll Ever Make (Restaurant-Quality)

The Best Fried Chicken You'll Ever Make
These 3 Dressings Will Upgrade Any Salad

The Michelin-Star Way to Make Salmon at Home

How to Make the Perfect Biscuits at Home

The Best Hamburger You'll Ever Make

These 3 Dips Will Level Up Any Dinner Party

The Best Steak You'll Ever Make (Restaurant-Quality)

The Best Grilled Chicken You'll Ever Make (Restaurant-Quality)

The Secret to Perfect Boiled Eggs (Soft, Jammy, Hard)

5 Garlic Techniques That Will Up Your Game

The Best Spaghetti and Meatballs You'll Ever Make (Restaurant-Quality)

The Best Pasta Bolognese You'll Ever Make (Restaurant-Quality)

The Best Prime Rib You’ll Ever Make (Restaurant-Quality)

The Best Fettuccine Alfredo You’ll Ever Make (Restaurant-Quality)

The Best Chocolate Chip Cookies You’ll Ever Make (Bakery-Quality)

The Best Brownies You'll Ever Make (Bakery-Quality)

The Best Chili You’ll Ever Make (Restaurant-Quality)

The Best Roast Chicken You’ll Ever Make (Restaurant-Quality)

The 6 Rules of Plating Used in Restaurants | Epicurious 101

The Best Way to Clean and Season a Wok

Why Stir Fry is Better in Restaurants (And How to Do It At Home)

Why Steaming is Better for Your Food (And How to Do It At Home)

The Best Mac and Cheese You'll Ever Make (Restaurant-Quality)

The Best Omelet You’ll Ever Make (Restaurant-Quality)

3 Corn Recipes to Level Up Your Cooking

The Best Cheeseburger Sliders You’ll Ever Make
29 Vegetable Tips Every Home Cook Should Know

7 Microwave Hacks Every Home Cook Should Know

Why American Cheese is a Pro Chef’s Secret Weapon

How to Make Perfect Pie Crusts for Thanksgiving

Recipes for a Perfect Thanksgiving Feast